Why Is My Word Document So Large and How to Reduce Its Size?
Have you ever started writing a word document and ended up wondering how its size got so large?
Do you just blame it on the pictures (if you have any) and come to terms with it?
Or you helplessly remove important information just for the size to fit the requirements?
You certainly have to be careful if you’re posting it online or sharing it via email. In almost all the cases, you will find the culprits to be too many and large images, very long text, and embedded fonts.
Read on to see the reasons for the huge size of the documents and some tips on how to reduce it.
1. DOCX vs. DOC Format
While it may seem irrelevant to many, the release of DOCX has saved lots of megabytes in documents without making a single change in the document.
This format has been released back in 2007 and it’s designed to act as a ZIP file as it compresses the contents of the document by default.
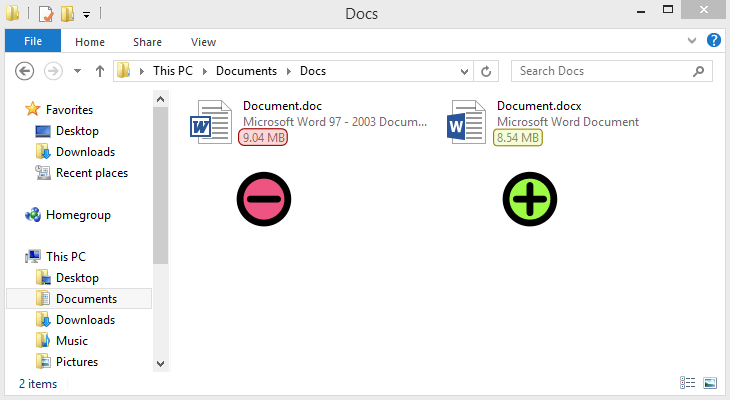
So, a document that is a few megabytes in DOC form would turn into a few hundred kilobytes when saved as DOCX.
NOTE: The only reason for you to save the document in DOC would be if you need it to be compatible with older (read: ancient) word processing apps.
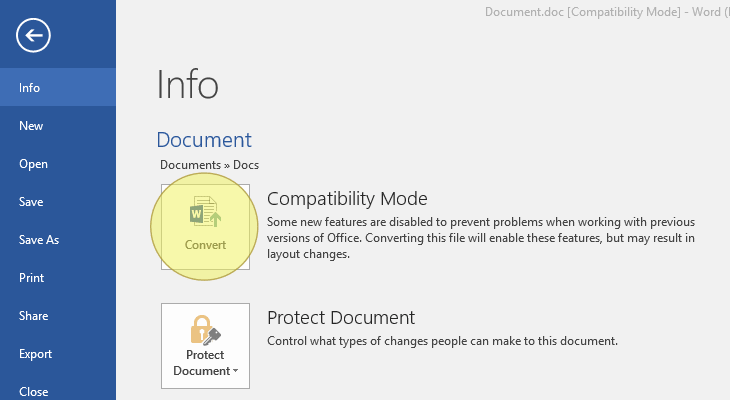
Simple yet efficient! When you do the conversion, the file will be saved as a new document so you’ll still have the original .doc version available.
2. Copying and Pasting vs. Inserting Pictures
If you copy and paste an image into your document, the image format such as BMP and PNG (and its large size) will be kept in the document.
Alternatively, pasting your image into an editing program and saving it as a JPG (smaller, space-friendly format of images).
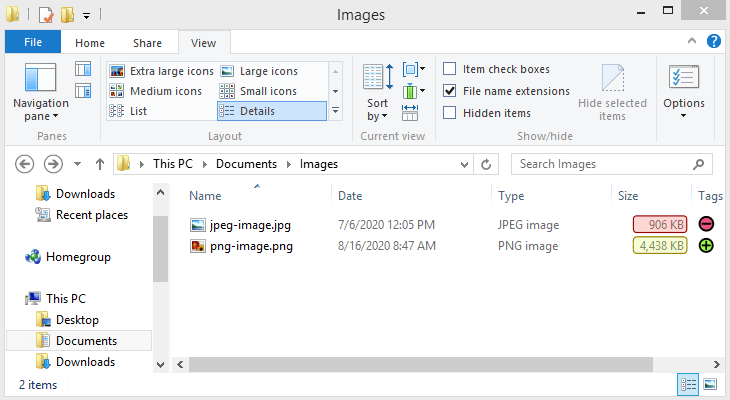
Then, using Insert > Picture to add it to your document will do its charm.
You will find the image size smaller by around 40%.
For the desperate: Using the GIF format results in a 60% smaller document.
At times, you will surely come across situations where you cannot make compromises with the quality of the image and you will need to find alternative way of reducing the document size.
3. Editing Images in Word vs. Saving an Edited Version
Similarly to directly copying and pasting an image, when you edit an image in Word, all of the changes will be stored as part of the document.
This means that even if you crop an image, the full original image is kept in Word.
Or, upon changing an image to black and white, the full-color image still remains in word.
If you are certain you do not need to revert the changes, you can either discard the editing data in Word, or even better, make the changes before inserting the image in your document.
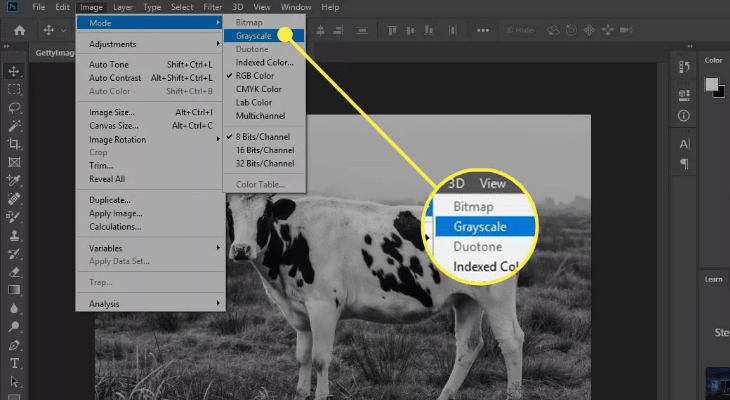
Make sure you perform any edits in a separate image editor, and then insert your image to prevent increasing the file size unnecessarily.
*Extra touch: Compress all your Images – In the Save As menu select Tools > Compress Pictures and select a Resolution for all the images in your document. *
4. Embedding Fonts in Your Document
When using custom fonts in a document, if another person who doesn’t have that font installed opens your document, they won’t be able to read it properly. This is why word allows you to embed fonts in your document, and make them legible to everyone.
However, this will take up more space. So, if you absolutely must keep the Embed fonts in the file option on, a suggested way of decreasing the size is to at least turn off Do not embed common system fonts to avoid embedding universal system fonts (in File > Options > Save tab).
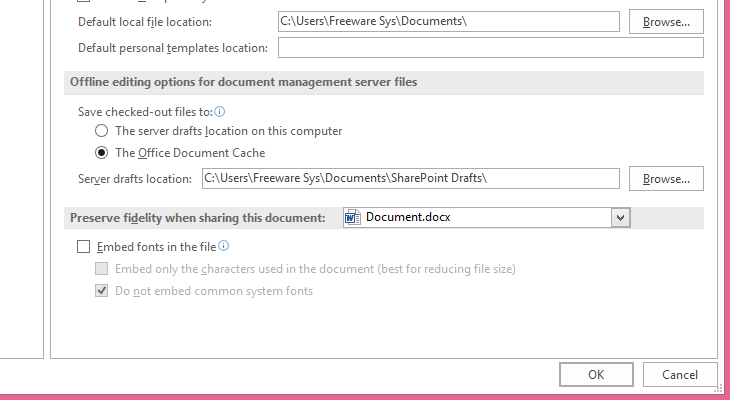
Maybe it may not seem much, but almost 2 MB of size are guaranteed.
5. Storing a Thumbnail for the Document
In the past, Word provided the option to store a thumbnail image of the document so that Windows could show you a preview in File Explorer.
Today, the thumbnail image can be shown in File Explorer by default, so this option is completely unnecessary and you should turn it off. You can change this setting in File > Info > Properties > Advanced Properties.
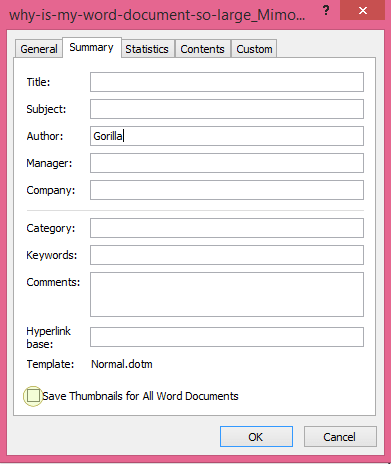
NOTE: Even though the name of the option says “all Word documents”, it will only affect the current one, so you will need to turn this option off in the Normal.dotx template. If you’re unsure how, make sure the check Microsoft’s instructions.
6. Personal and Hidden Information in Your Document
While you may find the size of the document decreased inconsiderably, keeping your personal information in the document has more serious drawbacks. You shouldn’t be providing your readers with any sensitive or unnecessary information.
You can remove it by going to File > Info > Check for Issues and then clicking the “Inspect Document” button. Turn on “Document Properties and Personal Information” and click “Inspect.” Upon finishing, click “Remove All” in the “Document Properties and Personal Information” section.
Additionally, there could be even information that is formatted as hidden in the document, so you can choose “Invisible Content” and “Hidden Text” options. This will make your file smaller only if there were hidden information in the document in the first place.
NOTE: This information cannot be recovered, so make sure you are certain in your decision.
7. Choose Alternative Format
Instead of trying different ways to reduce the size of your Word file, why don’t you go straight forward and convert your word document to PDF?
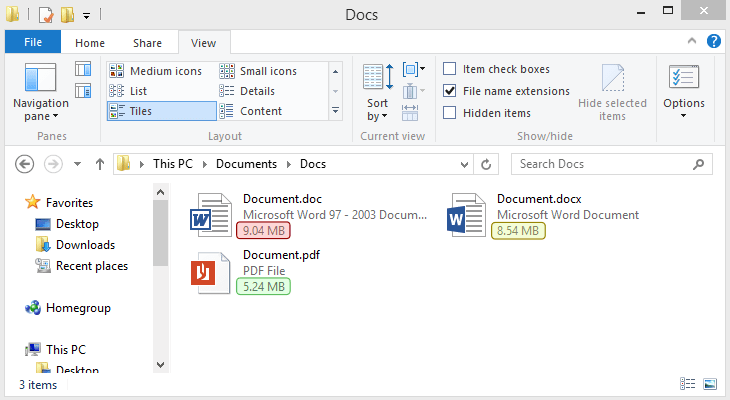
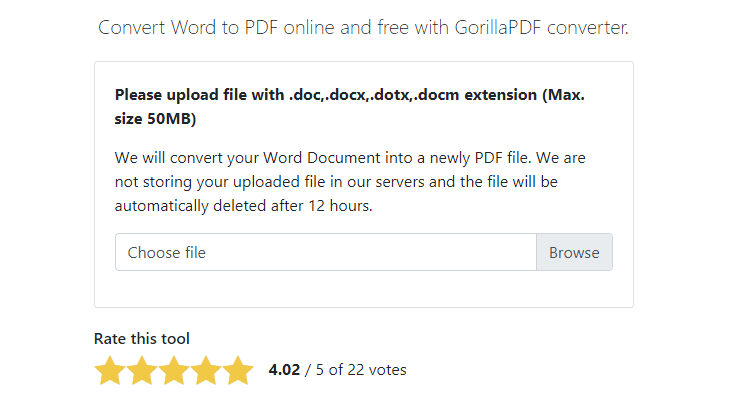
You can simply save your Word to PDF and do the job. Alternatively, Gorilla have a perfect tool in the Word to PDF Converter. Try it now and start cutting.
You know, Word is for creating and editing, and PDF is for presentation. So if the large Word you have is your final document ready for sharing, don’t wait and convert it to some more convenient format such as PDF in our case.
Moreover, you can additionally compress the PDF file with the compress PDF tool, and cut additional size if you need.
8. Only for the Bold and Carefree - Turn off AutoRecover
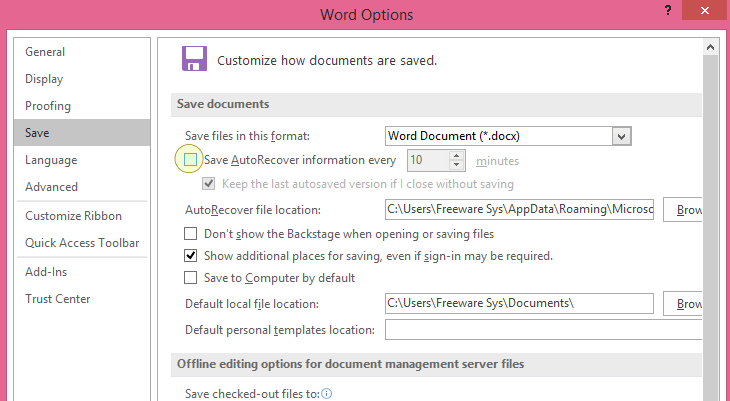
The AutoRecover feature makes regular backups of your file as you work, so in case Word crashes or your computers restarts unexpectedly, once you open Word again you will have an automatically recovered version of any document you had open.
Naturally, all of these versions add to the file size, so turning off this option will make your file smaller.
In case you are absolutely certain, you can go to File > Options > Save and turn off the “Save AutoRecover information every [x minutes]” option.
With this you risk losing all of your work in the event of an unexpected occurrence, so make sure you go through the other steps before resorting to this.
Final Words
You can always try some or all of above ways to cut the size of your Word files if you need an extra space.
Feel free to share your way to reduce the size of Microsoft Word documents.
Don’t forget to follow us and get all news by social.
