How to Screenshot on Mac
Screenshots are commonly used in everyday life as they allow you to share an image of your computer screen with others. There are various purposes of sharing screenshots, including reporting an issue with a program you are using or a business-related issue (sharing screenshots for business purposes), as a reference, or to show what you have been seeing at a particular time on your screen.
Regardless of what’s the purpose of taking screenshots, they are important, especially in business.
That’s why you should know how to take them.
Having in mind that not everyone knows how to take screenshots, in this article, we show you 5 ways to take a screenshot on your Mac OS supported computer without much trouble.
So, let’s have a look at it.
1. Take a screenshot of the entire screen
When you need to take a screenshot of your entire Mac screen, you should press Shift + Command + 3 at the same time.
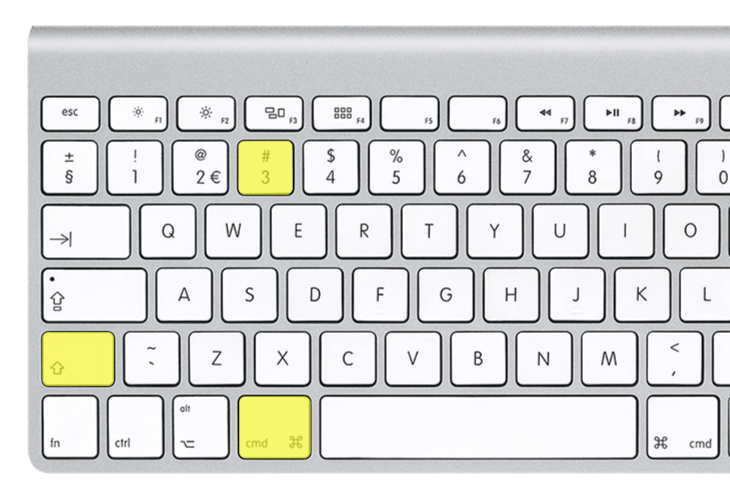
This will capture your whole screen, including any visible windows, your dock, and the toolbar at the top of the screen.
The screenshot is automatically saved in the PNG file format on your desktop with a filename starting with “Picture” and followed by a number, depending on the number of screenshots you have taken.
If you are using two or more monitors, make sure you are working on the one you want to take a screenshot of.
Copying an entire screen
Apart from screenshotting your screen and having it automatically saved as PNG, you can also copy it for manual editing and saving.
In order to do that, you should press Command + Control +Shift + 3 at the same time.
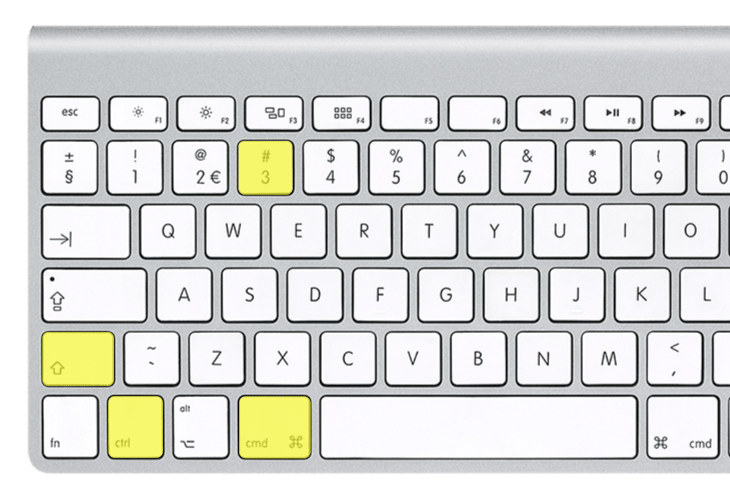
The screenshot will be temporarily placed on your clipboard so you can paste it into another image-supporting or editing program, such as Word, PowerPoint, Photoshop, or similar.
2. Take a screenshot of a portion of your screen
If you don’t need to take a screenshot of the whole screen but only a portion of it, you can do it by pressing Command + Shift + 4 at once.
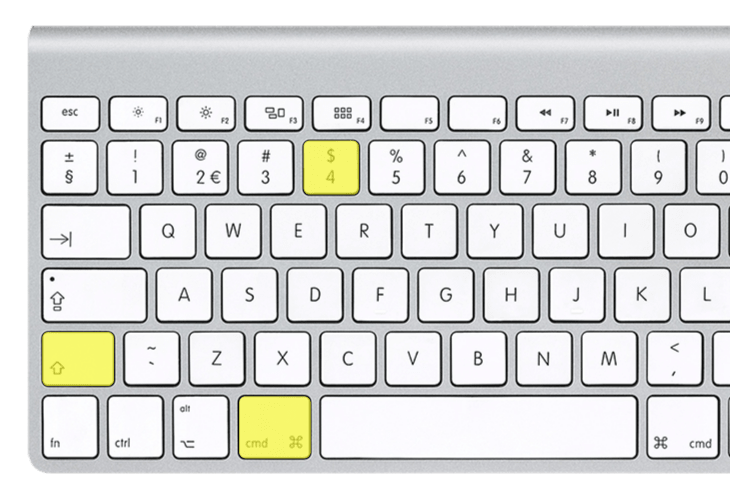
When you press them, a crosshair cursor will appear. Click on it and drag to select the area you want to take a screenshot of.
Once you select the whole area, release the mouse button and the screenshot will be taken and saved as a PNG file on your desktop.
Your screenshot will have a filename beginning with “Picture” followed by a number, as explained previously.
If you don’t like what you have selected, while still holding the mouse button, you can just press Escape. This will prevent the taking of the screenshot.
Copying a portion of the screen
If you don’t want to have a PNG file automatically saved from your screenshot, you can copy the portion of the screen you want to take a screenshot.
In order to do that, you need to press Command + Control + Shift + 4 at the same time.
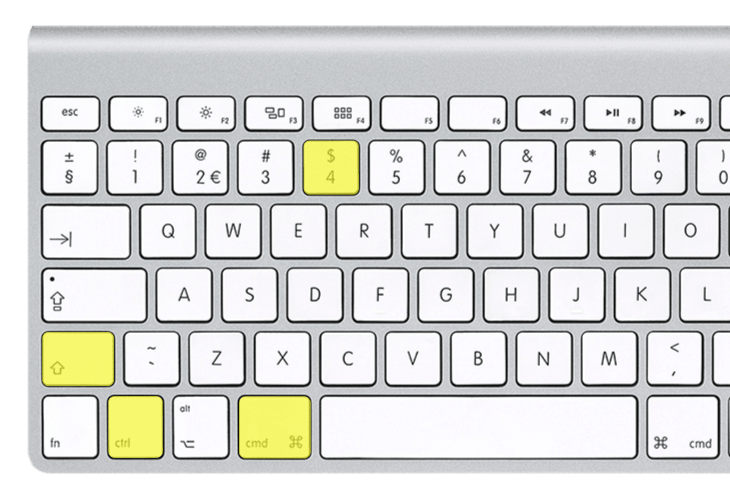
A cross-hair cursor will appear and you can click on it and drag until you select the area you want to take a screenshot of.
When you have selected the portion, you can release the mouse button, the screenshot is copied on your clipboard and you can paste it into another image-supporting or editing program, such as Word, Photoshop, and similar.
3. Take a screenshot of a specific window
Apart from the two above-mentioned types of screenshots, you can take on your Mac, you can also capture a specific window. To do that, you need to press Command+Shift+4 at once and then the Spacebar.
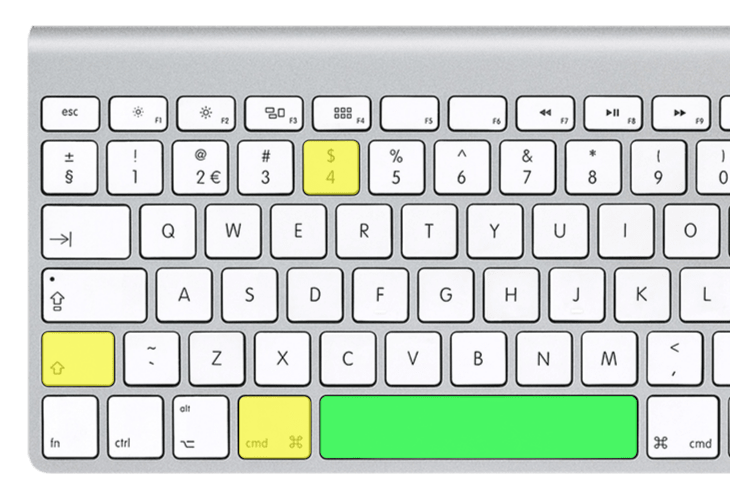
When you do that, the cursor will change into a camera that you can move around the screen. As you move the cursor over the app window, the area will be highlighted, suggesting its marked. The app window doesn’t have to be entirely visible, as long as the cursor is on it and the window is highlighted.
When you have the cursor on the window, you can click the mouse button and a screenshot of the window will be taken and automatically saved. You will find it as a PNG file on your desktop with a filename starting with “Picture” and a number after it.
Copying a screenshot of a specific window
If you want to edit or paste a screenshot of an app window in another program instead of the desktop, you can copy it instead of taking it. You can do it by pressing Command + Control + Shift + 4 and then the Spacebar.
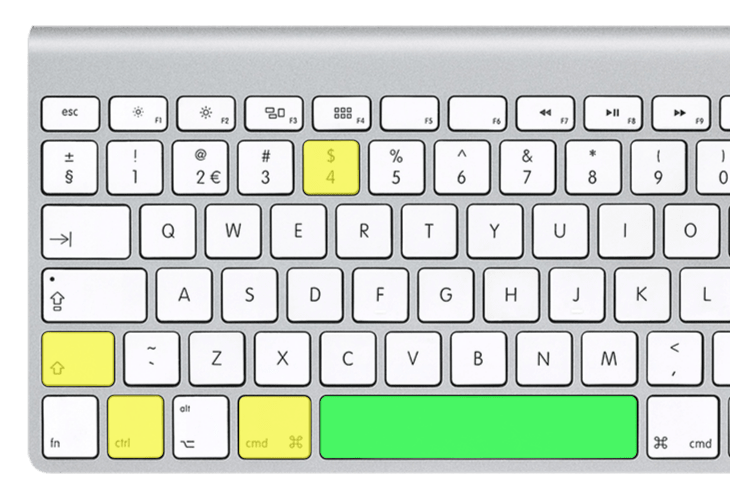
The cursor will turn into a camera, which you can move across the screen. As you move it over the app window, the window will be highlighted, meaning it’s selected. It doesn’t have to be entirely visible, as long as it’s highlighted.
When you are sure you have selected the app window you want to copy a screenshot of and its highlighted, you can click the mouse button.
The screenshot is copied on your clipboard and you can paste it in the program you want.
4. Using Preview to Take Screenshots on Mac
Preview is an app that comes with the macOS or OS X itself.
It’s fully supported in macOS Catalina 10.15, macOS Mojave 10.14 and macOS High Sierra.
You can use it to take the three types of screenshots mentioned above.
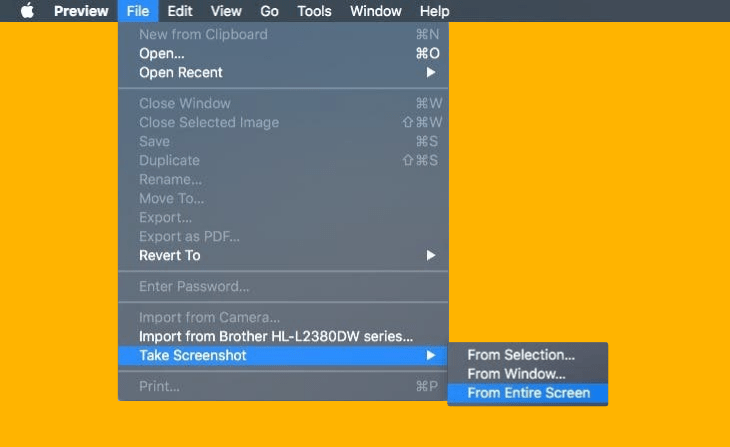
Let’s see how you can do that.
Screenshot of the entire screen
- Open Preview or press Command+Spacebar and type “Preview”.
- Once opened, click on File in the upper-left of the top menu bar.
- From the drop-down menu, choose Take Screenshot > From Entire Screen.
Screenshot of a portion of a screen
- Open Preview or press Command+Spacebar and type “Preview”.
- Once opened, click on File in the upper-left of the top menu bar.
- From the drop-down menu, choose Take Screenshot > From Selection.
Screenshot of a specific window
- Open Preview or press Command+Spacebar and type “Preview”.
- Once opened, click on File in the upper-left of the top menu bar.
- From the drop-down menu, choose Take Screenshot > From Window.
5. Using Grab to Take Screenshots on Mac
Although Grab is no longer available for macOS Mojave (10.14) and above, you can still use it if you have an earlier macOS version backup available–like High Sierra or Sierra.
Grab is a default app of macOS you can use to take screenshots on Mac.
Unlike the basic way and Preview, using Grab allows you to take four types of screenshots.
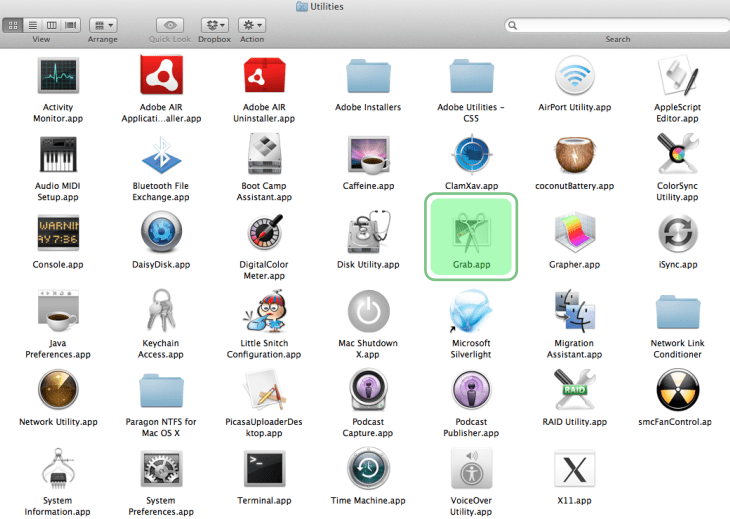
It also allows you to choose the format of the screenshots and their destination.
And, you don’t need to use your keyboard, only your mouse or trackpad.
Screenshot of an entire screen
- Open Grab or press Command+Spacebar and type “Grab”.
- Go to the screen of which you want to take a screenshot.
- Right-click on the Grab icon in your dock and choose Capture Screen.
- When the prompt appears, click outside of it to select what you want to capture.
- Close the screenshot window.
- Save the screenshot by selecting the format, location, and name of the file.
Screenshot of a portion of a screen
- Open Grab or press Command+Spacebar and type “Grab”.
- Go to the screen of which you want to take a screenshot.
- Right-click on the Grab icon in your dock and choose Capture Screen.
- When the prompt appears, select the area you want to capture with your mouse or trackpad.
- Close the screenshot window.
- Save the screenshot by selecting the format, location, and name of the file.
Screenshot of a specific window
- Open Grab or press Command+Spacebar and type “Grab”.
- Go to the screen of which you want to take a screenshot.
- Right-click on the Grab icon in your dock and choose Capture Window.
- Click the Select Window button.
- Click the window you want to take a screenshot of.
- Close the screenshot window.
- Save the screenshot by selecting the format, location, and name of the file.
Screenshot of a timed screen
- Open Grab or press Command+Spacebar and type “Grab”.
- Go to the screen of which you want to take a screenshot.
- Right-click on the Grab icon in your dock and choose Capture Screen.
- When the prompt appears, click the Start Timer button.
- The time will go and after 10 seconds Grab will take a screenshot of the screen seen at that moment.
- Close the screenshot window.
- Save the screenshot by selecting the format, location, and name of the file.
Conslusion
We showed 5 ways how to take and edit screenshots on Mac. GorillaPDF is willing to develop a Screenshot related app in near future. Yet, we feature a few tools that you can use after taking your screenshot on a Mac such as converting your PNG or JPG image to a PDF file.
Don’t forget to follow us on social media, and never miss articles or new tools.
